


In this blog post I want to write about how I created an accessible Markdown editor extension, that was made for the blind or visually impaired and how I realized it as an extension for Visual Studio Code.This was part of a university project called AGSBS, who translate books for blind students and teach them better ways to study with a disability.This is an interdisciplinary task, and is composed of computer science students and staff of the computer science faculty, and blind students from other parts of the university. The computer science part of this was to create tools that blind or visually impaired people can use, to write/translate books. This tool is mainly an extension for code editors and started as an extension for Sublime editor, and was later reprogrammed for Atom. It also used a custom Markdown render engine. The backend for this was also created at the same chair at our faculty and is called agsbs-matuc. However, Atom is not/ barely usable with screen readers. In that context, the extension is not quite useable for he targeted audience.
My Task
The person I was assigned to was Jens Voegler. He maintained the code for the Atom extension, and asked me if I want to rewrite the extension for Visual Studio Code, a (back then) new editor who was not only screen reader friendly, but even optimized. But more on that later. Also, Visual Studio Code supports extensions, is written in TypeScript and is documented quite well. We wanted to create an interface that has buttons for all necessary functions to write this extended Markdown:
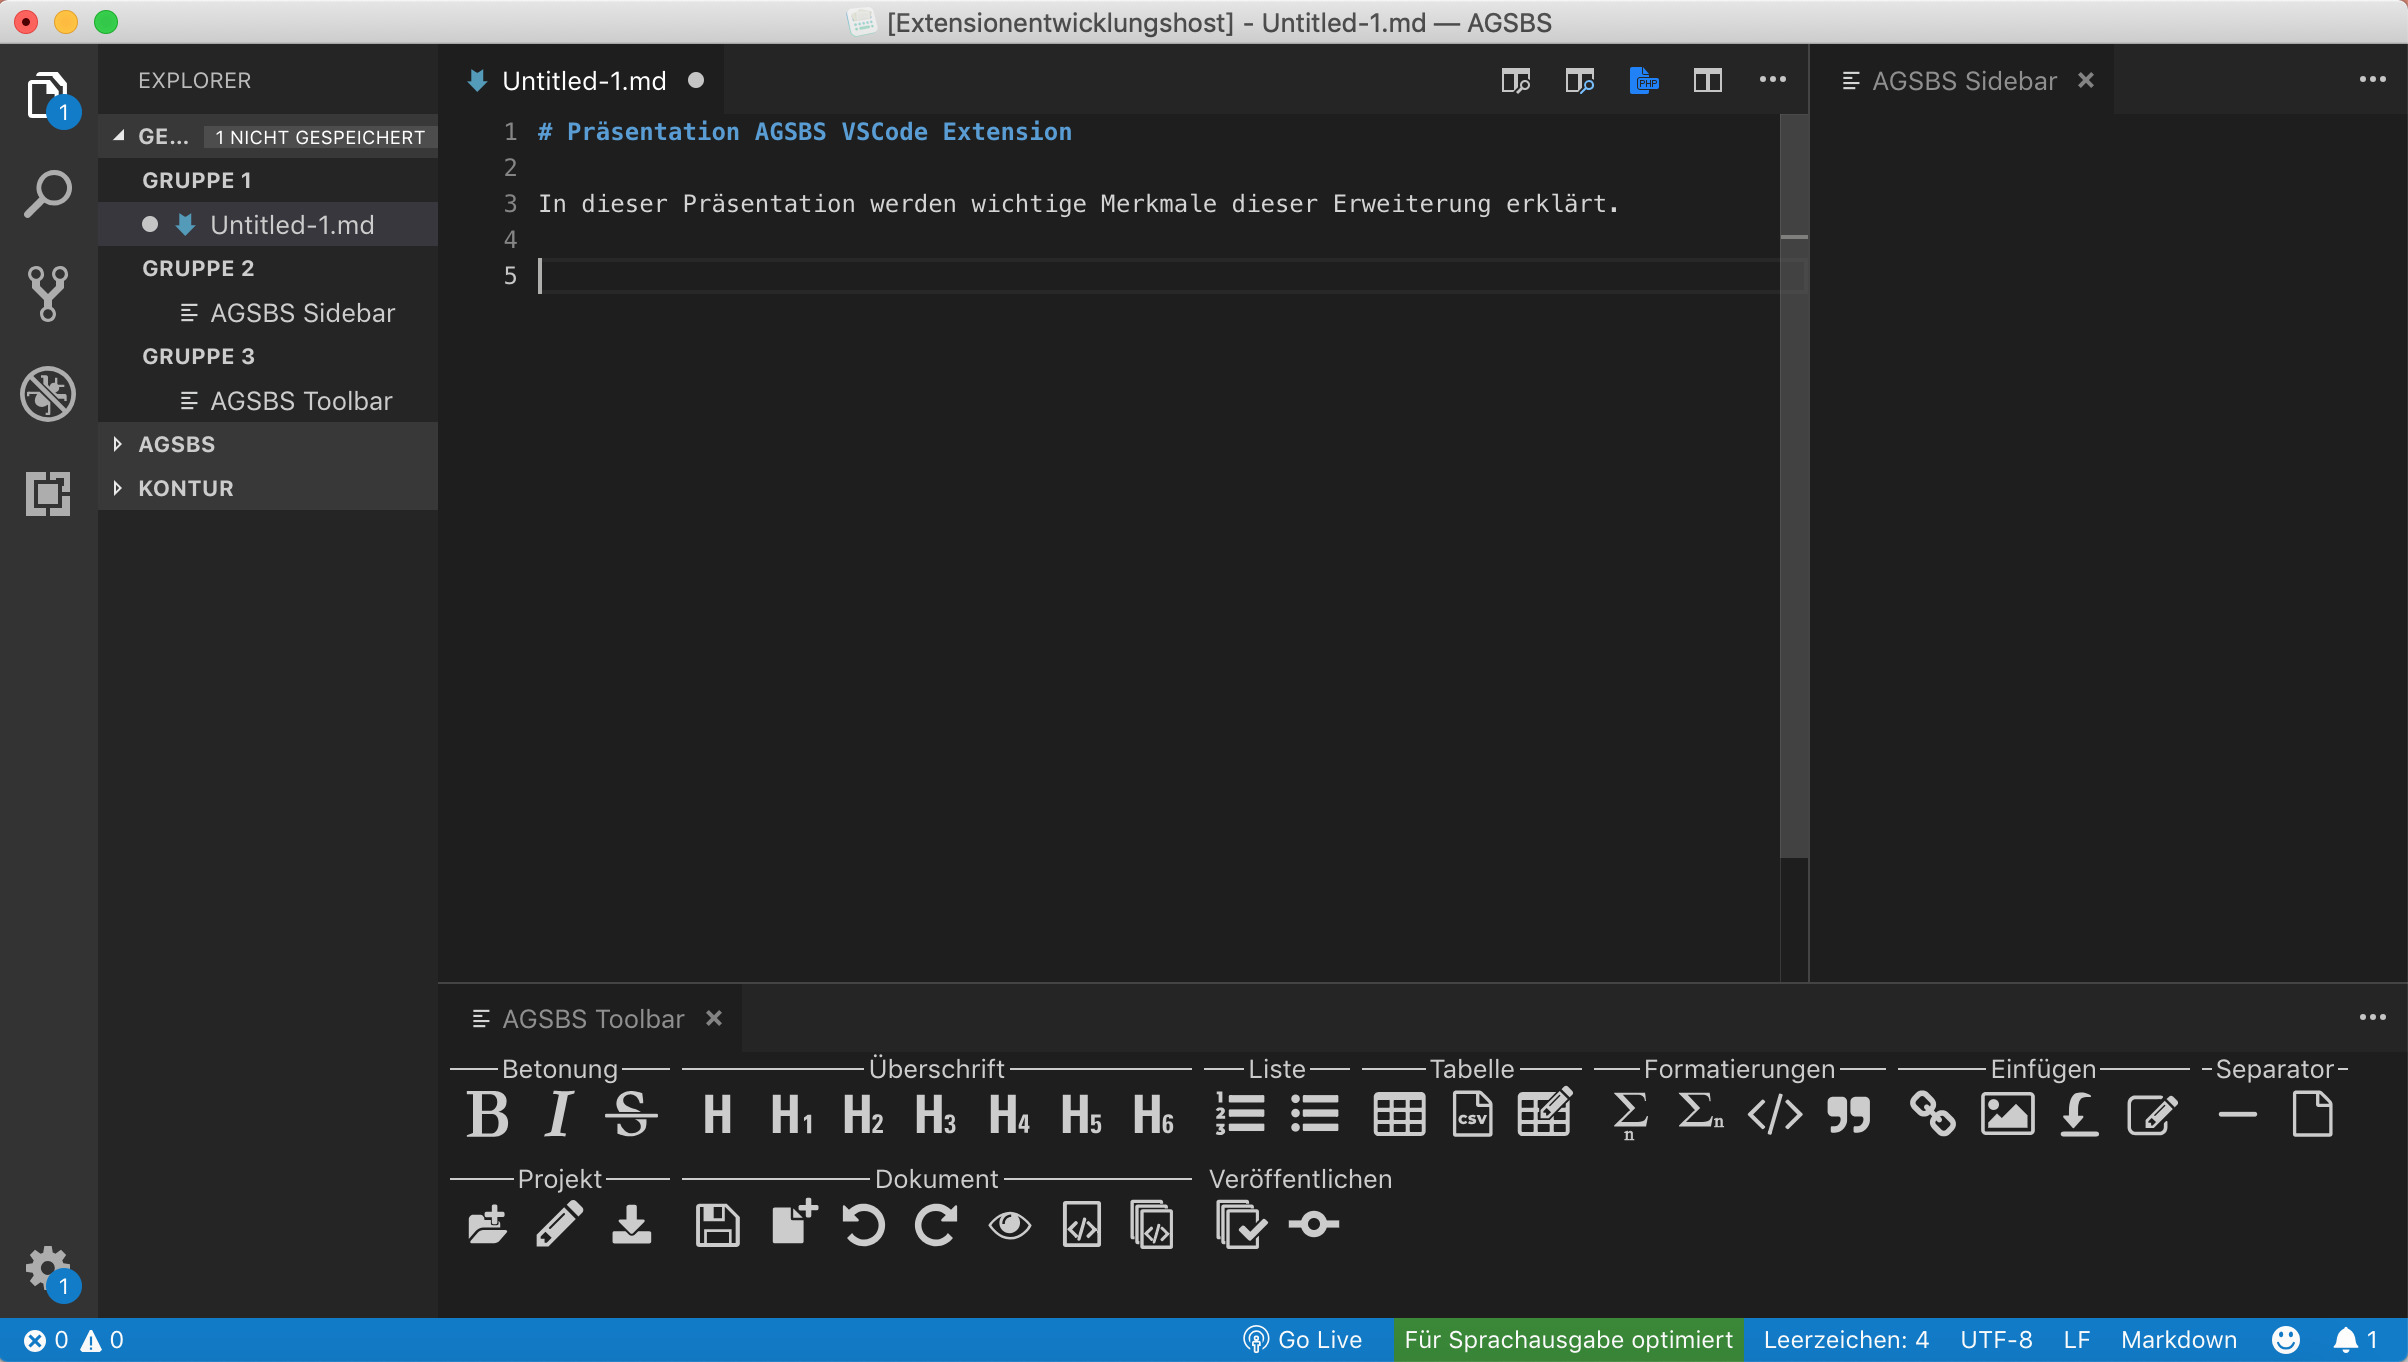 This is the final extension for VSCode, how it looks when you first open it.
The Challenge
The only problem was, that VSCode explicitly does not support own toolbars, only icons in the existing one. It also does not allow screen overlays, or accessing the Editor DOM in general. This has major advantages and disadvantages. A big advantage is low loading time of the editor when it starts. Also, your interface remains clean. The disadvantage is mainly for accessible extensions. For example, some visually impaired people prefer big icons, as those are easier to recognize than text or the existing small icons on the bottom built in toolbar.
The Solution
I instead used webviews to generate toolbars and “overlays”. As you can see in the image above, there is a main toolbar at the bottom of the screen as well as a sidebar, which is empty at the moment. I wrote a custom framework, which provides an easy high level API for creating tools in the toolbar at the bottom as well as easy dialogues in the sidebar.
Now the code can be as simple as this:
this._taskbarCallback.addButton("bold.svg",
                this._language.get("bold"), //name of the button
                this.bold, //function to call
                this._language.get("emphasis"), //name of the toolbar section, the button is in
                "agsbs.bold");//quickselect-name

public bold = async () => {
    await this._helper.toggleCharactersAtStartAndEnd("**", "**");
}
This adds a button to the toolbar and binds a function to it. As you can already see, the extension is Multilanguage-capeable. Sadly, back then there was no native API to add Multilanguage extensions, so I had to write this myself. Another example with a sidebar dialogue:
    public insertLink = () => {
        var form = this._snippets.get("insertLinkForm");
        this._sidebarCallback.addToSidebar(form,
                        this._language.get("insertLink"),
                        this.insertLinkSidebarCallback,
                        this._language.get("insertLinkSubmit"));
    }

    /**
     * gets called when the 'insert Link'-Button is pressed
     */
    public insertLinkSidebarCallback = async (params) => {
        var stringToInsert: string = `[${params.linkText.value}](${params.url.value} "${params.linkTitle.value}") `;
        await this._helper.insertStringAtStartOfSelection(stringToInsert);
    }
This adds a form to the sidebar. After submitting it, it will execute the bound function. Yes, this could be written in a better way, but I only had about 4 months and I was the only one to write this code. So it turned out rather nicely. It will look something like this:
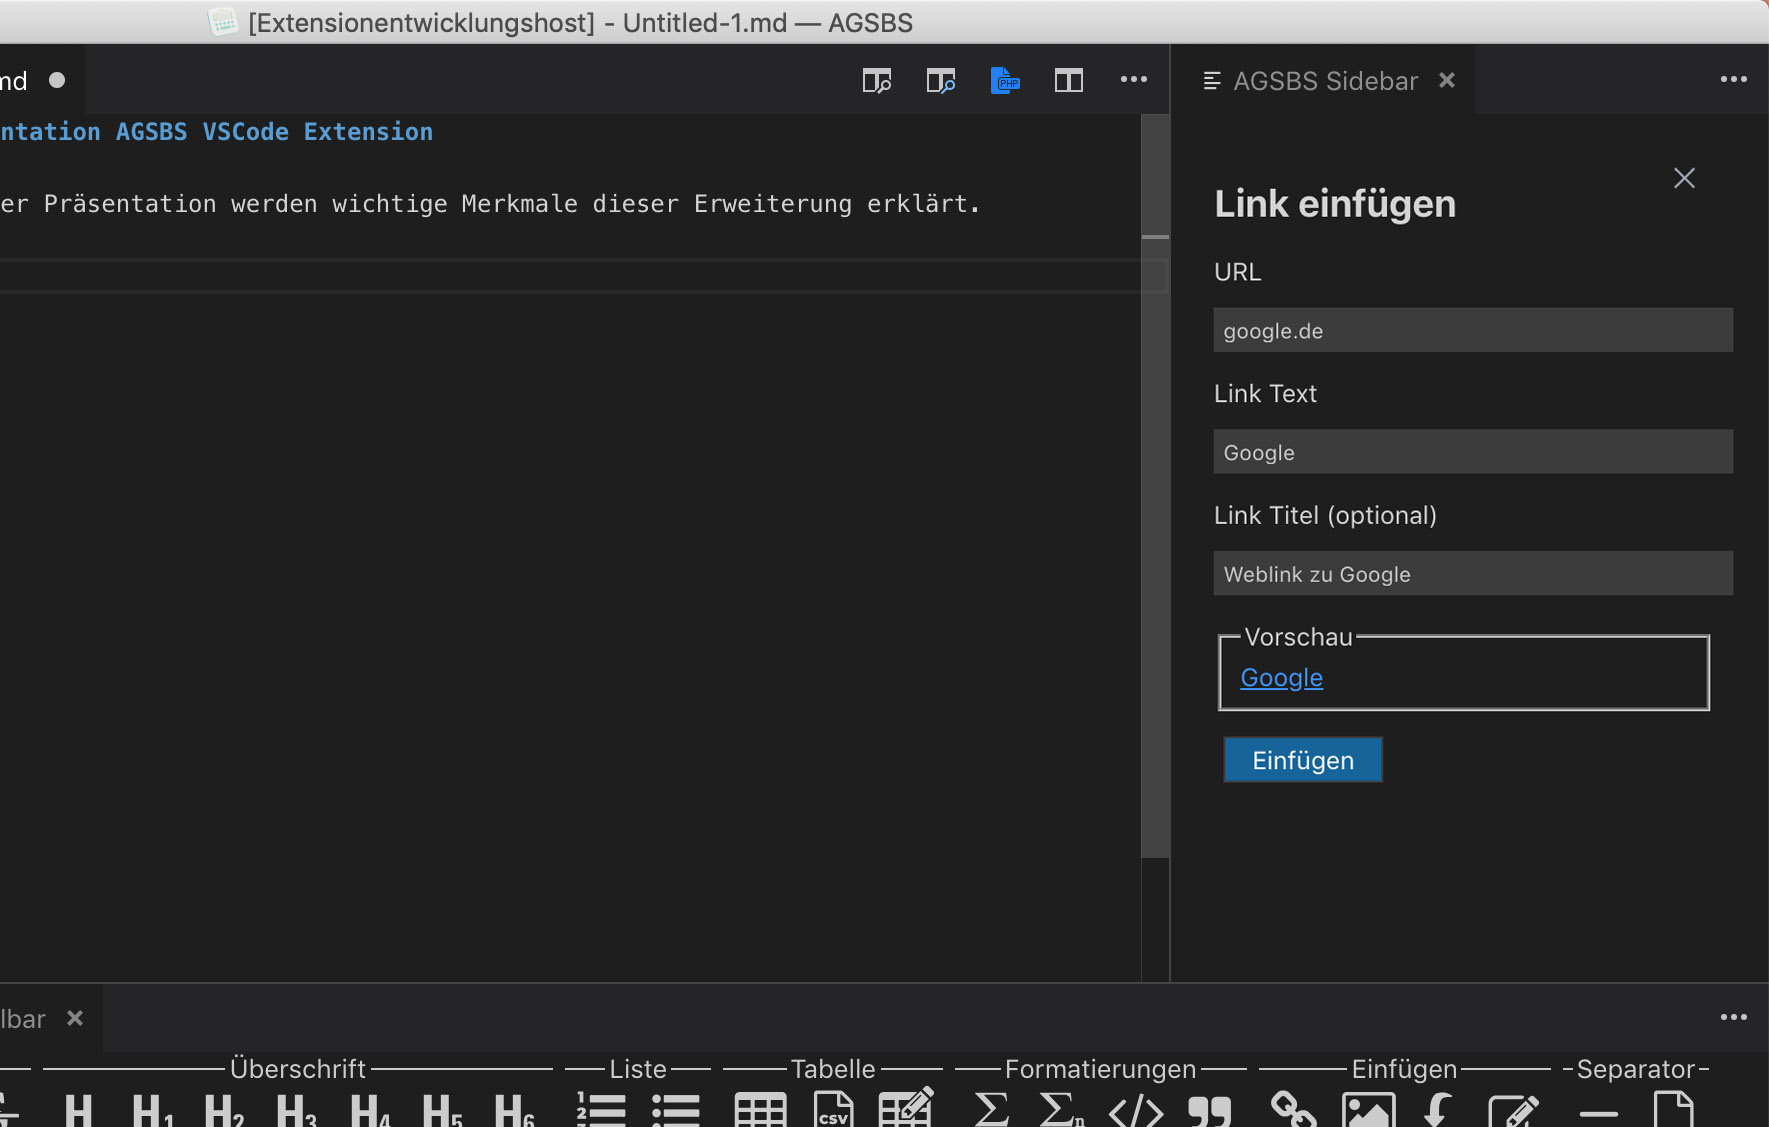
In this case, the function inserts a weblink and provides alternative text for blind people. This all is not natively possible with the given Visual Studio API.
What? How?
This uses some nice TypeScript/Javascript features of arrow-functions. The main advantage was that they could be given to another function that can call it. I needed that, because arrow-functions don’t have their own this-context and instead use the context of the code executing it. This made it possible to write this clean and easy to read code.
My plan is to write a blog post about the technical realization of this extension, because it is rather complicated. Right now, I just want to talk about what makes this extension so special.
The Features
There are many features in this extension. To simplify, I want to split them up into three parts: simple, extended and advanced. As there are way too many tools to explain every one of them, I will focus on the most exciting ones.
Simple Features
The most basic features consist of the normal text formatting. This includes functions like bold, italic and strikethrough, but also headlines and a headline function that inserts the same headline as the previous one. Because this is the most simple stuff, I just wanted to mention it, and quickly move on to the next category.
Extended Features
The simplest ones of the extended features are numbered lists. It automatically increments the number. It also can import Images and create Links, both with preview. But this is simple, let’s look at a more interesting part: importing CSV-Data. This was one of the most requested features, as it allows users to use a table editor of their choice. Also, markdown tables are a pain to write by hand, even if you are not blind.
For that, I used a library called Papaparse. It can convert CSV into JSON and JSON back to CSV. My part was to write code, that will convert the resulting JSON into the Markdown format. The challenge was to support corner cases, like multiple lines in one cell. But wait, there is more!
Advanced Features
One of the most advanced features is creating and editing Markdown tables inside of Visual Studio Code. Most of the time, it is difficult to add or remove content to a table in Markdown. But with this extension, you can do this:
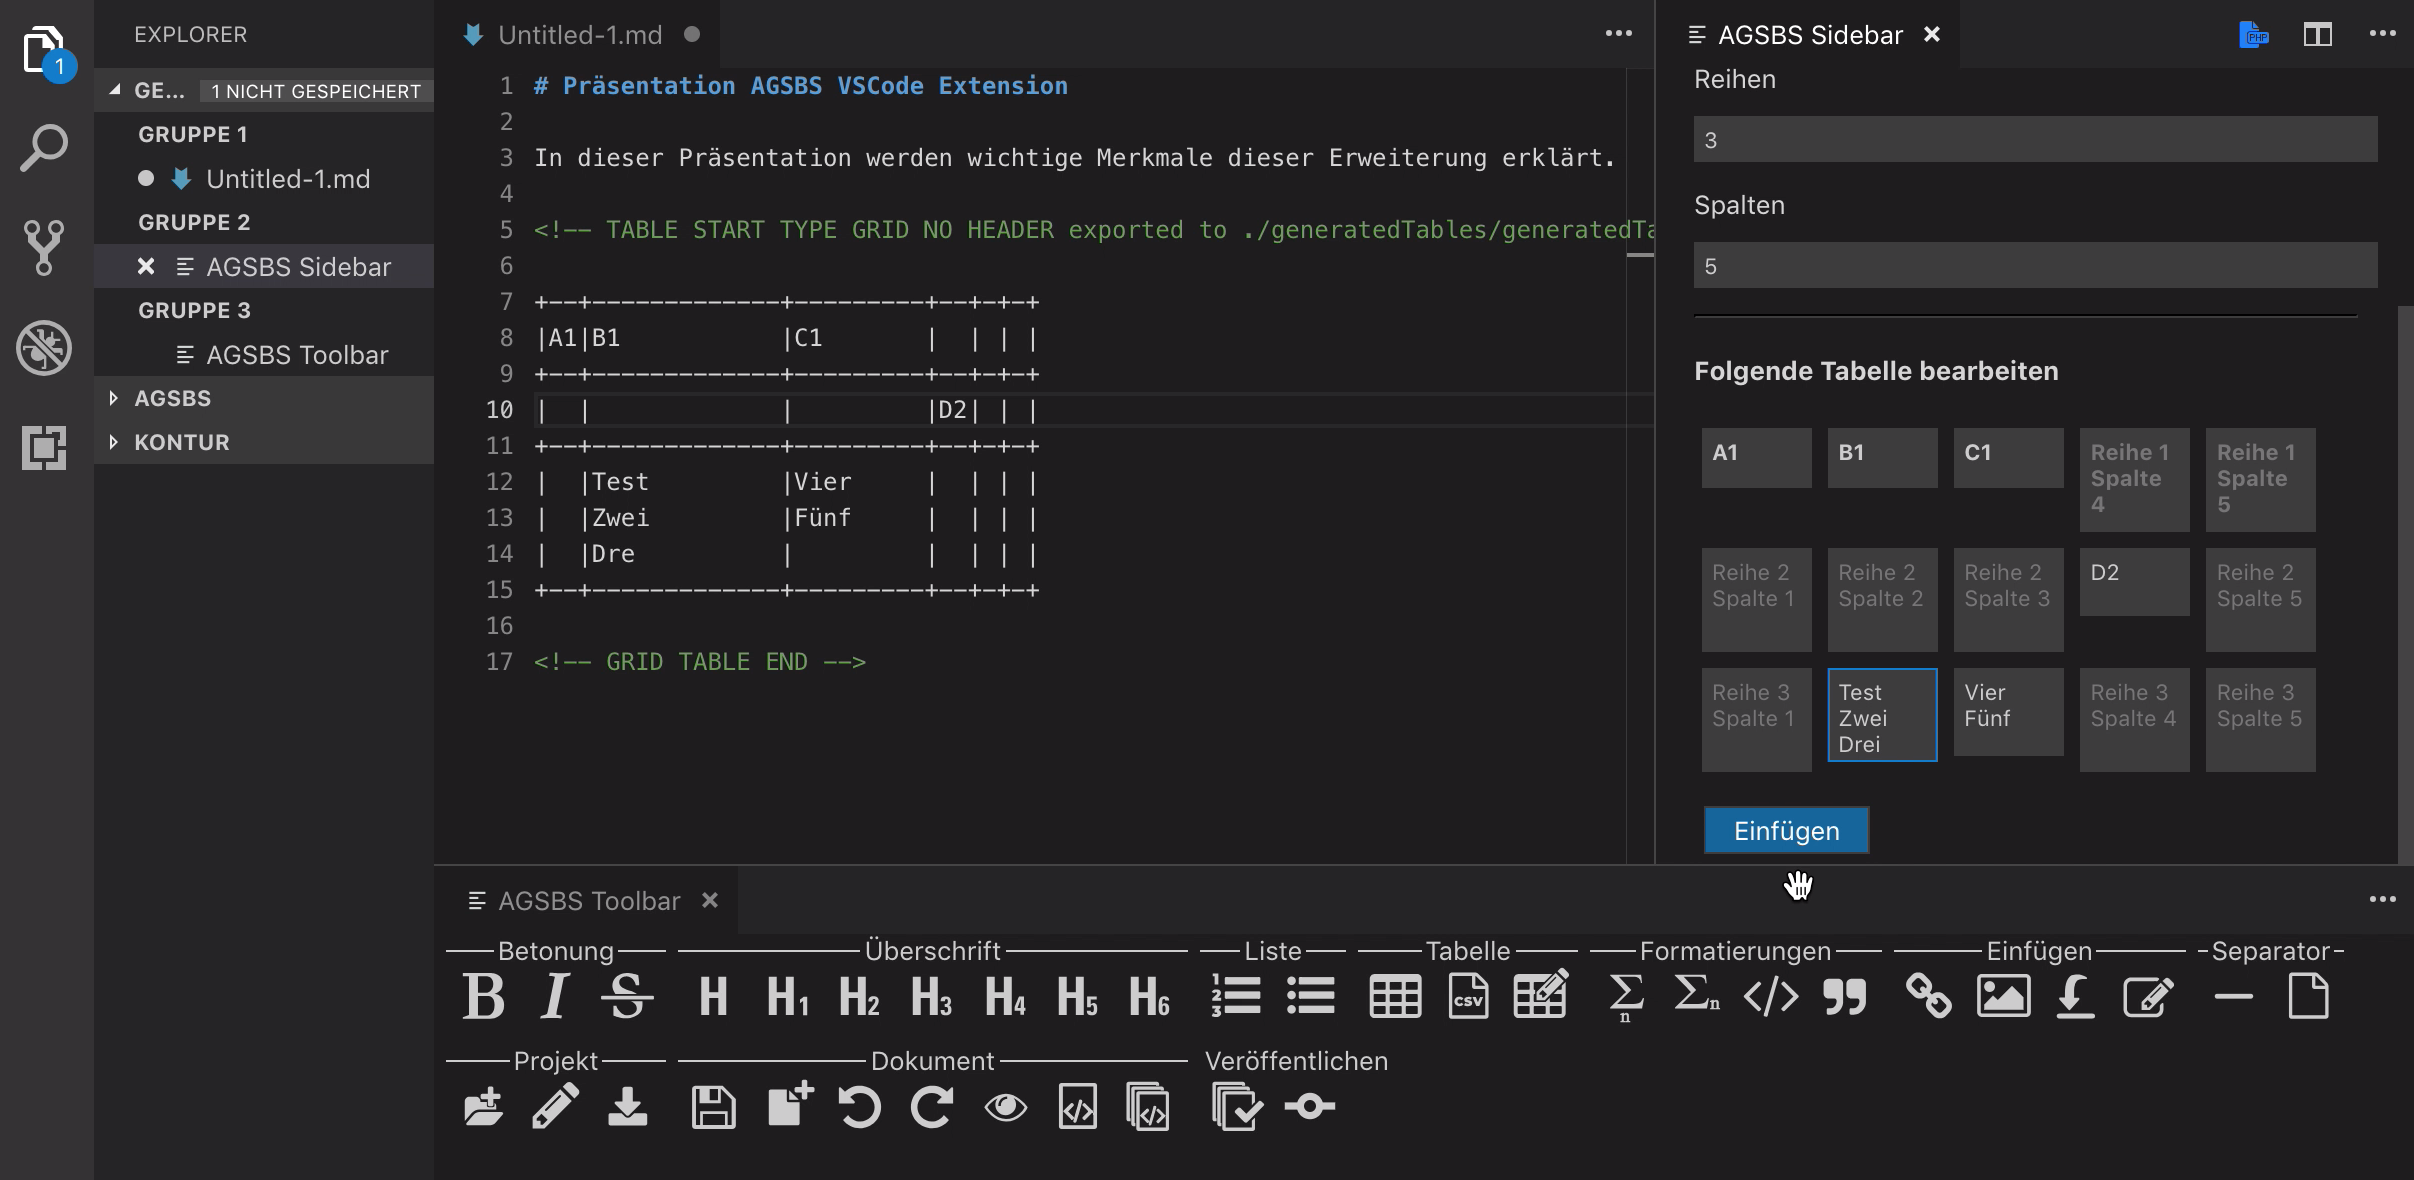
Editing tables with this is quite easy. You position your cursor inside of an existing table, and press the “edit table” button in the toolbar. If you are done editing, it will export your table in a local directory relative to the open Markdown file, and replaces the Markdown table.
But there are other features as well, which should be mentioned. For example, it automatically detects collisions (e.g. you cannot place a table inside a table), reorders and reopens the sidebar/toolbar if accidentally closed, has git integration, Markdown error detection, is fully theme compatible, can be controlled using the F1 action menu, is 100% screenreader useable and has quickjump shortcuts to jump to the toolbar or sidebar for blind users.
The Conclusion
With this post I wanted to show what is possible with Visual Studio Code, and how it can be used to write an accessible, feature rich and user friendly Markdown editor extension.
You can install it here: